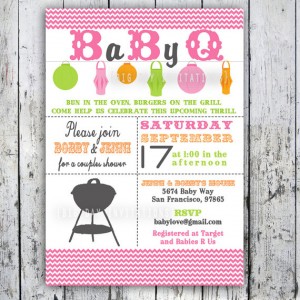
Baby Shower BBQ Series: BaByQ Invititations & Party Planning
Entering that chapter of my life where all of my friends are starting to have babies–which equates to LOTS of baby showers. And after spending this summer going to 8 different baby showers and also throwing one myself, I decided it would be fun to do something a little different. Thus the BabyQ Baby shower idea came about. I was happy to find though that there were already people out there doing this on a regular basis and I utilized some of their resources and ideas to create our own BabyQ baby shower party.
As you all know, we love to barbecue and what better way to throw a party than with a backyard barbecue!
Here are a few of the first steps to launch a great but simple BBQ Baby Shower — Or I should say BaByQ!
1. Get the new Mom to start working on a list of people she wants to invite along with their addresses. This can take them some time (depending on the individual) so get going on this early so you aren’t sending out invites one week before the party…it’s good to give people at least a month notice so they can calendar it out.
2. Looking around online I found these cute invitations on Etsy from Big Day Invitations. All I had to do was send them my details for the party, let them know what color theme I wanted (they had 3 options available) and they sent me back a high quality Baby-Q Baby shower invitation to print out! If you don’t have a high quality printer you can always just go to a local print shop for them to print or Big Day Invitations will do it for you and mail them to you as well. Click HERE for a direct link to their Etsy order page
3. Pick a BabyQ color theme–seems like an obvious thing but it isn’t. I got asked this question a lot from the friends helping and I didn’t have the answer right away in the beginning. It is FAR easier if you have your color theme picked out before hand. If you have help of friends who are doing the desserts, decorations, etc, the number one question you’ll get asked is what colors to work with. Know this answer ahead of time.
4. Start working on a menu idea (see our recommendations in the next post in this blog series)! Especially if you are going to ask friends to make different dishes to help out, it is almost easier to have a list of what you plan on making so they can just pick and choose from the list as to what to make–versus coming up with a hodgepodge menu that doesn’t go together.
5. Enlist some friends of the Mom-to-Be to help out. Throwing a party is far more easy if you have a little extra help! Delegate, delegate, delegate.
After you take care of these steps you are ready to move to Stage 2!
Tags: baby shower BBQ, Baby Shower BBQ Menu, Baby-Q theme, BabyQ, BabyQ theme, Barbecue, BBQ baby shower ideas, BBQ Blog, BBQ menu


Sorry, comments for this entry are closed at this time.